Make a advents candlestick ..

| |
Before
you start. |
| - |
The
tutorial is made in Psp 7.0, but works in any
version. |
| - |
I
assume you are used to working with layers. |
| - |
Use
any colour you like ..
I have used PsP's own pattern "Stained
Wood" |
| - |
Remember
the Undo button  .. .. |
| - |
Please
don't take this tut and claim it as your own, or
use it in a collection or copy it .. |
~¤ ~ ¤ ~ ¤ ~ ¤ ~ ¤ ~ ¤ ~
 1. 1.
Open a new image 500 x 300,
Width; 500 (bredd) Height; 300 (höjd)
Backgroundcolour; transparent. press OK
Maybe you think the image is to big .. ..
but I like to have plenty of "room to work" and
when the image is finished .. just Crop it ...
Add a new layer, named it foot, use Preset Shape tool
 use my settings
see image and choose the shape "Telephone
Typewriter" if you dont have it, you can download it from
Jasc homepage, you find it
under "Installer for additional Jasc shape libraries [3 MB]") use my settings
see image and choose the shape "Telephone
Typewriter" if you dont have it, you can download it from
Jasc homepage, you find it
under "Installer for additional Jasc shape libraries [3 MB]")
Stroke: Null
 Fill: Pattern "Stained
Wood" Fill: Pattern "Stained
Wood"
make it so big..
that the "receiver" almost fills the image,
make a selection around the recevier (see image)
Choose Edit copy.
Rightclick on the layer ( on the layer palette) and
choose Delete, or choose Layers - Delete from the menu ..
choose
Edit Paste - As New Layer
2.
Choose,
Selections - All,
Selections - Float
Choose CutOut see my settings below
repeat Cutout one more time,
change Vertical and Horizontal to -15,
press OK.
 3. 3.
It looks "dark" so, to lighten it up ..
Choose
Colours - Adjust - Gamma Correction ..
you can see my settings below, but if you have you used
another pattern you maybe need to change the settings, or
oyou are pleased with the "dark" wood ..
 4. 4.
Add a new layer,
name it "holder"
Use the Selections tool 
make a square selection, 100 x 100
Use the same pattern..
I have used "Stained Wood" ..
Scale; 100
Angle: 225
But try yoor own settings ..
if you dont angle it ...
the effect will be different ..
5.
Choose
Effects - Geometric Effects - Circle
Selections - Modify - Contract, 1, press OK.
Selections - Modify - Feather, 2, press OK.
Choose Edit copy.
rightclick (on the layer palette) and choose Delete,
or choose Layers - Delete from the menu. Deselect
 6. 6.
Choose
Edit Paste - As New Layer
Select the sphere
Choose Selections - Float
Repeat the Cutout and Gamma Corrections and use the same
settings ..
Deselect
7.
Now the Edge..
Create a new layer ..
Use the Preset Shape tool, with the same settings ..
but change the "telephone" and make a rectangle
on top of the sphere..
Hold CTRL and move the upper corner outwards ..
 Choose, Layers - Convert to
Raster Layers Choose, Layers - Convert to
Raster Layers
Select and repeat
Cutout and Gamma Correction with the same settings..
Merge the layer with the sphere and the edge,
Duplicate three times (or as many you want)
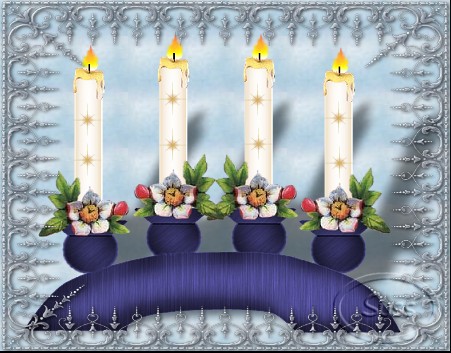
use the Mover tool and place them into position..
..
decorate and add some candles..
Save ..

~¤ ~ ¤ ~ ¤ ~ ¤ ~ ¤ ~ ¤ ~
I hope you liked my tutorial ..
good luck !

Thanks to Barbara for the help ..
My friend Suss made this
|

