|
This was made using Paint Shop Pro 7 and Eye Candy, but you can also use
the CurlyQ's effect for a nice result.
If You want to use selections, you will need to download these Selections,
and save them in your selections folder.
or use the polarbear.psp file, contain one
emty layer and all the selections, in Alpha Channel..
* To use selections, choose
Selections - Load from disk (from Alpha channel if you using
the psp file).
Fill every selection with the foreground color,
contract the selection by 1 and fill with teddy pattern.
Pattern to
use,

 Remember to save often...
 1. Open 350x350 transparant
background, (I have filled my background layer, with a dark color, it makes it
easier to work with, and for you to see...)
1. Open 350x350 transparant
background, (I have filled my background layer, with a dark color, it makes it
easier to work with, and for you to see...)
2. Set your Foreground colour to
gray #808080 and your Background colour to Pattern, the white teddy
Pattern, see image
3. Add new
layer, call it body.
4. Use
the Preset Shape tool  an make a circle for the body
(or use the polar_body selections)
Rightclick on the layer, choose Duplicate,
and with the  Mover
tool, move the head into position Mover
tool, move the head into position
Rightclick again, and rename the layer head.
5. Create a new layer named
backlegs ..
Use
the Preset Shape tool
an make two legs, and one feet (see my image below)
(or use the polar_leg -feet and toes selections), then use the
 Draw tool and draw lines for the toes.. (optional)
Then, move down the legs and toes .. under the body layer..
6. Create a new layer named
frontlegs, above the body layer ..
Use
the Preset tool
an make two legs, and two feet (see my image below)
(or use the polar_leg selections), then use the
Draw tool and draw lines for the toes.. (optional)

7. Create a
new layer named ears, above the head layer ..
Use the Preset Shape tool
an make two circles, (or use the polar_ear selection)
8. Create a new layer named muzzle ..
Set the Foreground Color Null  , and
change the background to black color.
Use the Preset Shape tool an make a vector
rectangle selection like mine, , and
change the background to black color.
Use the Preset Shape tool an make a vector
rectangle selection like mine,
(Or use
the muzzle selection)
Use the  Object Seletor
tool, and press Node Edit, rightclick in the image
and choose, Object Seletor
tool, and press Node Edit, rightclick in the image
and choose,
Edit - Select all, rightclick again, and choose Node type - Symmetric.
Then rightclick and choose, Quit Node Editing ...
Choose, Layers - Convert to Raster Layer.
Effects - 3D Effects - InnerBevel, Presets: Round, but change the Angle:
0,
9.
Now the mouth and eyes. Create a new layer named eyes ..
Use the Draw tool and
paint the eyes and mouth ...
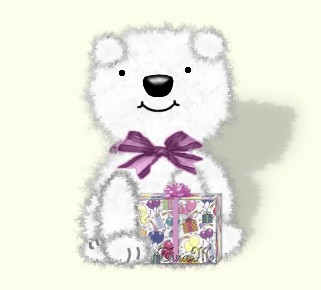
You polarbear would look like this ...
 10.
Now the fur ... 10.
Now the fur ...
Repeat this step for every layer ...
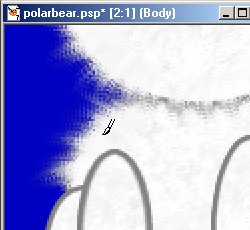
We are going to give all the layers some nice fur..
Use the  Retouch tool, and "paint", make small strokes inwards, (to make
the fur, trying to follow the head body parts shape.) Retouch tool
settings see the image
Retouch tool, and "paint", make small strokes inwards, (to make
the fur, trying to follow the head body parts shape.) Retouch tool
settings see the image
This will take a little
time to get use to and to get it just the way you want.
(I didnt use the Retouch tool for the toes, eys and mouth)

10. Now some more
fur ...
with the EyeCandy Jiggle effects or PsP's CurlyQ's effect ..
 Repeat this step for every
layer ... Repeat this step for every
layer ...
CurlyQ's
Make a selection around
the part you will add the effect on..
Choose Effects -
Geometrics effects - CurlyQ,
use this settings;
Repeat if you want. (Edit
- Repeat QurlyQ's  ) )
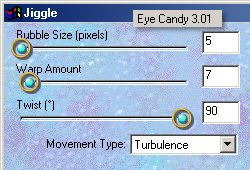
EyeCandy Jiggle
Select the layer, and add the effect..
Effects - Plugin Filters - EyeCandy - Jiggle, use these settings..
Change layer,
Choose Edit - Repeat ..
for each layer ...
Save your image ...
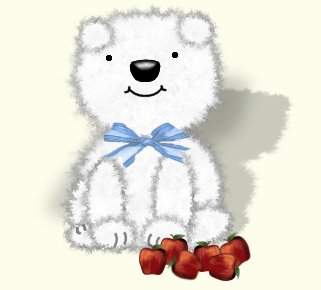
Have
fun !
Thanks
for trying my tutorial.
|