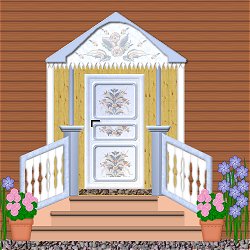
 Entrance EntranceEntrance of the Hälsingland farms is famous. I made may own ... I have used these tools and worked in lotsa layers.... I like to work with multiple layers and I will suggest a new layer for nearly every step in this tutorial. I find it much easier to rearrange things and change my mind or make corrections if everything has it's own layer ..you can merge the layers when ever you want..... Some pictures are shown 50% , for a full (and much better) view , simply click on the sample Don't forget to SAVE frequently ... |
 Let's start with the stairs .. Create a new image, 500x500, call the first layer step I used the color, foreground #E2AD8E and background #BF805D |
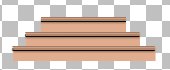 Select Select (make it wider if you want) and fill it with foregroundscolor, create another rectangle and fill with backgroundcolor Choose ; Effects - 3D Effects - Buttonize 4 , 1 , 75 , TransparentEdges , OK choose ; Effects - 3D Effects - Dropshadow , V: 3 , H: 0 , Blur; 5 , Opacity; 30. Drag the step - layer button over the Create Layer to duplicate the layer .. use the duplicate one more time ... and make the new step more wide .. Rename the layers .. I called my step 1 , 2 and 3.... |
 Add a
new layer called stepside. Add a
new layer called stepside. Create a rectangle 140 x 40 Choose Color - Adjust - Brightnes/Contrast 20 , 15 , OK Choose Layers - Arrange - Send to Bottom |
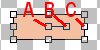 Click on the Click on the (A) move the object, (B) rotate (C) change the size ... 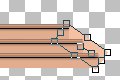 Duplacate the layer Choose ; Image - Mirror , move into place .... 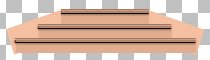  For a straight outside line ... carefully make a selection around any excess overlaps of the stepside ... Then go to Edit - Cut and it will be removed. |
 Now the banister .... Now the banister ....I want PaintEngine effects on mine .... Create a new image , 200 x 200 and fill with color. I used #C3D2F1. Apply any effect you like. I choose PaintEngine with these settings ; 1.10 , -5 , 00 , 67 , -8 , 00 , 1.21 , Wrap Edges checked. Upphill+Intentsity1 , line checked , 39 , 1.39 , 120 , 130 , 30 , 20 , R , Apply. Choose ;  Selection
- Selection all. Selection
- Selection all.Selection - Modify - Contact 10. Selection - invert Edit - cut. Selection - Invert Selection - Modify - Contract 20. Edit - Cut. Selection - Invert Edit - Copy Change image ... go back to original image. Edet - Paste - As new Layer. Rename the layer "left banister" |
|